Gas Training – How To Do A Tightness Test.
Trainee plumber doing his safety checks on a gas metre and also a tightness test. My name’s Allen Hart. And in today’s video, we’ve got one of the trainees from Viva Training Academy and I’m going to show him how to do a tightness test on a gas metre. We’re also going to go through all the safety checks that you will be doing on a gas metre as well. If you could, I’d be very grateful if you could put some comments below, if you give him some encouragement in the comments below, that would be great. He will be watching this video, there’s no doubts about that. Yeah, so let’s go over to Ali.
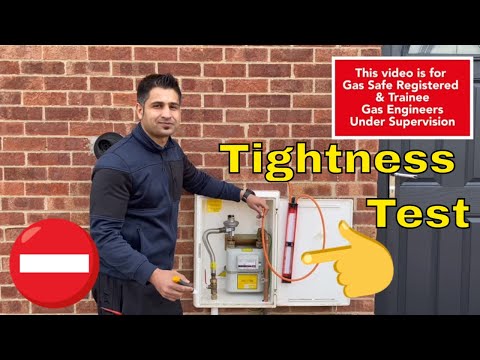
This video is for Gas Safe registered and trainee gas engineers under supervision. Please comply with the current regulations at the time.
Do you want to open the gas metre and show me what we need to be looking for?
Yeah. So first of all, you just need the key from the gas box, gas metre box. Some basic safety checks that you need to do in your metre box are, firstly, you need to be making sure that the ECV, the emergency control valve, falls to the opposition.
Yeah.
Okay. And that should bring it to on, and then you should also have some sort of a label that shows which is the on and off position for an emergency situation.
Okay, going up the Anaconda, you need to make sure that the seal is on the governor. That’s just to make sure that it’s not been tampered with. And on the metre itself, you should have the emergency number. This is the number for Cadent, so if you smell gas or owt like that, that’s the number that the customer needs to be ringing. Okay?
And then you need to be making sure that the metre itself is secured, right? That looks in good working condition. Another thing that you need to check is that you have 10 millimetre earthing wire that is within 600 millimetres or within the first T junction.
Or before the first T. Yeah.
Or before the first T.
Yeah.
And you need to make sure that you have the … What is the name of this, Allen?
That’s just an earth clamp.
That’s an earth clamp. Right. Okay. Yeah?
With the gas at labelling, the number, it could be whoever the gas transporter is at the time. So I always call it Transco because that’s what it used to be. Obviously, it changes … National Grid …. Sometimes in different areas, it’s different as well. But it’s always the same phone number to phone, and it’s 0800 111 999. And that’s if you can smell gas leaks, et cetera.
What type of metre installation is this? It’s an actual, it’s a low pressure.
It’s a low pressure, yeah.
If it were a medium pressure metre, then we’d have to make sure the gas pipe’s not allowed to go through the back of the metre as well. But we’ll talk a little bit more about medium pressure in another video.
Yeah, that sounds good.
So we’ve looked at the basic safety things to check on the gas metre. Now Ali’s going to show us how to do a tightness test. So yeah, let’s go over to Ali.
Today we’re going to be doing some tightness testing with Allen. First of all, before we touch any metal appliances, any gas appliances, we need to make sure that it’s electrically sound. Just for the purposes of this video, we’ve already completed that before we started. Now, the next part that we need to go on to is making sure that our manometer, also called the U-tube gauge, is in good working condition and is level to zero, zero.
So for the next part of our test, Allen, what we’re going to do is we’re going to turn off the gas, and what we’re going to do is going to perform a let-by test. A let-by test is essentially a test to see if the ECV, the emergency control valve, is letting gas out whilst it’s supposed to be closed. Okay? So let’s remove the test nipple and put our manometer in. Okay. We need to make sure that our piping is straight, the tube is straight, so we don’t get an incorrect reading. What we need to do now is bring the pressure up to between 7 and 10 millibars. So yeah, as you can see here, it’s just under 10 millibars and we need to allow that to run for one minute.
The purpose of this test is to see that if this valve right here is letting by, if it’s allowing gas to pass through here. And the reason why we do this test is because if it is letting by and if it did have a leak on the system, then that’s now something that we’d be able to pick up because we’ve got that gas leak is being covered up by the gas that’s being allowed to come through here. So we’ve just allowed this to run for one minute and as we can see here, it’s still on 10 millibars. So we can confirm that the ECV is not letting by.
We can now move on to the temperature stabilisation test. What we’re going to do is we’re going to put this up to between 20 and 21 millibars and we’re going to allow that to run for one minute. So we’ve allowed the temperature stabilisation to run for a minute and we can see that it’s still the same and it doesn’t need any readjustment.