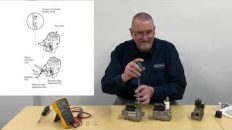
#GasTraining Tightness testing. Viva Training Academy. And we’re going to show you a tightness test. I’ve got an expert trainer today, Russ, the expert trainer, and he’s going to show us how to do a tightness test on a U6 and a G4 gas meter, a low pressure system. So yeah, let’s go and have a look.
GAS TRAINING. HOW TO DO A TIGHTNESS TEST.
Thank you, Allen, for that. My name’s Russ from Viva Training Academy This morning we’re hoping to take you through, well we’re definitely going to take you through, tightness testing, the basics at least, and we’ll build up from there. My experience is 40 plus years in gas industry, and the last 22 or 3 in training, specifically, mainly domestic, but also commercial.
Why do we tightness test? Obvious reasons really, to make sure we weren’t leaking any gas, but also for other reasons, we’re looking at pressures. We’re looking at the installation in general, and we’re also inspecting, has it been installed correctly before we even do a tightness test?
What we have here is a typical metre installation. Although there are a number of faults on it, and this is something you need to be looking for before you start even doing your tightness test. There is obvious things to a gas engineer that will become second nature to you as you go along. The main tap itself, is it secured correctly? Simple things. Does it fall to the off? What we mean by that is, should it be not, it would close not open by accident. There should be a label here saying which direction to move that lever in. All faults that should be rectified as you go along. Metre regulator, is it sealed? The metre itself, is it secure?
And when we move outwards from there onto the main pipework, there should be what we call, earth bonding. In other words, a connection to the main electrical circuit, should there be any stray current which would trip the safety devices. It should be visible. It may not be visible, but it should be visible for the gas engineer to be able to know it’s there. If it’s not, we’ll come to it later. It’s just paperwork exercise, what we need to cover here. It should ideally be before the first branch or first T on the pipe work. If there’s only one pipe within the first 600 millimetres of the metre outlet.
You’re also looking for this label on the front of the metre. There should be details on here, who to contact in the event of a gas escape. That is also a legal requirement. That’s already on when the metre comes, but they have been known to come off, they have been known to come adrift. You’re looking for obvious signs of damage and all in all shapes and sizes, really. Prior to doing the tightness test, we’ll turn the gas off before making any connections with the U tube gauge or whatever gauge we’re using.
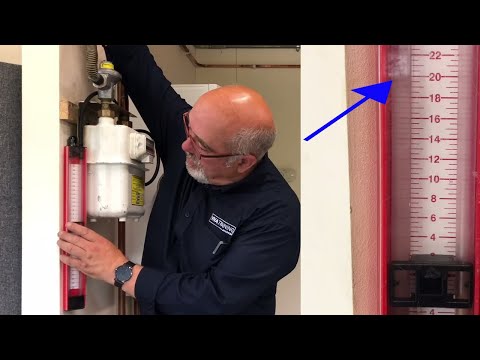
Right, installing the U tube gauge, always difficult to find somewhere to secure it in this particular case, we’re taking the pipe round the back but for ease of. You find somewhere to stand it up, hang it up, they do come with a stand quite often. There’s various ways you can fasten that up. The screw on the metre, the test point on the metre. It shouldn’t be tight, if it is tight, don’t bring it so tight afterwards. They are only a small screen and they do snap off quite easily. The U tube gauge, we’ve always already checked to make sure the integrity of the gauge is good. You won’t be the first engineer to spend a while looking for a leak that’s on your old equipment. Always check your own equipment first. Putting the gauge onto the metre. And that’s the basics. Already zero-ed the metre and the gauge, as I say, and that’s ready to test.
So what we’re going to do first is a let-by test.
Why do we do a let-by test? We’re trying to prove the integrity of this valve. Why do we need to prove the integrity? We want to know, is the valve sound in itself? Is it passing any gas through it? If that valve is passing gas, it could mask a small leak on the system. If it’s leaking as much as it’s passing, you’d never know we had a gas leak. So we need to prove, first of all, is that valve gas tight. To do that, we pressurise the system to a smaller pressure, which allows us to be able to see any rising pressure if that valve is passing. In this particular case, we’re going to raise it to approximately 10 millibars, the book says 10, 10.5, in fact the book says 7 to 10, but around that pressure will prove the point.
tightness test gas training gas test soundness test let by let-by let by test gas tightness test procedure gas tightness test gas drop test gas meter test gas test procedure natural gas operating pressure pressure test gas training tutorials gas training videos gas tightness testing gas tightness test method statement gas tightness testing procedure gas training centre gas soundness test procedure gas leak test procedure viva training academy
let-by, the