How to replace a Central Heating Pump. Boiler Pump. Central Heating Pump. Apprentice Plumber changing his first pump on a central heating system.
we’re going to do a video on replacing a central heating pump. We’re actually doing a power flush on this job, so we’re taking the pump out, and then we’re going to put the same pump back in. But I just thought it would… a good opportunity for Richard, who is here somewhere. Richard’s training to be a… What are you training to be, Richard?
Gas engineer.
Gas engineer. Richard’s training to be a gas engineer. He’s doing like… What are the courses called, Richard?
It’s-
Is it a fast track course, is it?
Yeah, yeah. It is, yeah. It is.
Richard’s doing a fast track course and he’s just come with me to get a bit of experience. So we’re going to take this pump out, or Richard’s going to take this pump out, and he’s going to have it live on YouTube so everybody can see. Let’s have a look.
No pressure then, Richard. Dropped in deep end yet again.
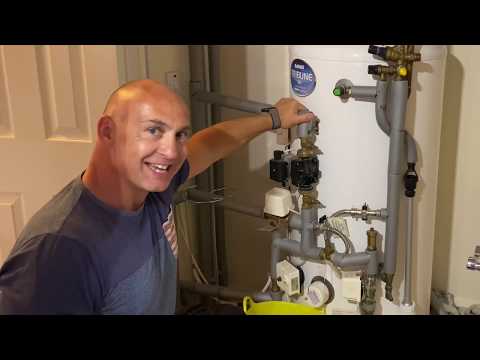
Again. Yes. Okay. My job today is to remove this pump. First of all, I’ve turned off the boiler. I’ve safely isolated the electrics, and I’ve turned off the water to the pump, which I need to do here for isolating from these two valves. Yeah, and then I can remove the pump from these two nuts here using beautiful tool, which is designed perfectly for removing the pump. That’s it.
Just to make this clear, what’s happened, the electrics have been isolated and tested to make sure that they’re safe and that Richard’s not going to get an electric shock. We don’t want any shocks. And then on this one, this one’s quite easy. It’s got some pump valves on it, and Richard’s going to turn these off and he’ll show you that shortly; turn them both off and then just open these nuts here, slowly open the nuts, and then drip the water out into a tub. As he says, we’ve got a special spanner that fits pumps really easy. You can also use grips. Got any grips somewhere? You can also use just normal grips if you haven’t got a pump spanner. We’ve also got this for draining down. So you can put that wherever you want to make it easier for draining down.
Turn these valves clockwise.
No pressure, then, Richard.
No pressure.
First time ever.
We’re there now. We’re there now. This should isolate the water. (silence)
You don’t need to get carried away doing it too tight. And then now you’re going to do this one as well.
Do the bottom one. (silence)
One thing to be careful with this is when you’re going to undo it all, if you’re going to take anything off, just make sure it’s under control as much as possible and that you’ve got things in place if something goes wrong.
What we’ve got in place on this one, we’ve got the Nerrad versa funnel and there’s other ones. It’s just a flexible… That’s just flexible, moves about, stays wherever you move it. We’ve got some blue roll behind just to hold it in place and protect the electrics underneath. We don’t want water to get into the electrics. We’ve also got this tub here to drain water into, and then we’ve also got some other little tubs as well.
(silence) Just nice and steady. Just let it do it itself.
Yeah.
Just a bit at a time. (silence)
That’s sort of stopped; it’s just slowly dripping now. And now Richard’s going to remove this and also remove this as well, these two nuts on the pump valves. One thing to be careful is, the pump and to make sure that you put it on the right way around after. On this one, this is the flow coming in. It goes down there. It goes down to that T; one goes to one valve, down, and then one goes to another valve, which is there.
This valve here is for the hot water, and that goes into the hot water cylinder; and this is an unvented cylinder. And that [inaudible 00:06:12] valve there, that goes that way down there, and that goes to the central heating system. Let’s take the rest of this pump out then, now, Richard.
Yep. Okay.
Other way. Keep hold of that pump, because it’ll fall. It might be a bit tight, so just wiggle it back and forth a bit, just slowly. When it starts water coming out like that, just stop and let the water go. (silence).
There we go.
Richard’s removed the pump. Now, just one thing, to check them seals on there. If you’re going to put your pump back in, just make sure these seals are in good condition. It’s always a good idea to put some new rubber seals on if you can, if you’ve got any available. And then obviously to put your new pump in, you just put your pump back in, in the same way and the same direction as well. So you need to make sure that it’s going in the same direction. So in this case, that’s the flow, as I’ve said already, and it’s pumping down towards the valves. So you just need to make sure that you get that on the right way around.