HOT UN Dry tundish installation. I’ve got Russell, the inventor of the Hotun from the company RA Tech. He’s come to do a demonstration of their products.
This is a dried tundish, and you could use this if you’re going to instal a new combi boiler into like an airing cupboard, or if you want to get the PRV out but this can make it easier because you might have the drain there already. But it’s not as easy to get the pressure relief valve, so this might be a product that you could use for that.
But what I’ll do is I’ll pass you over to Russell and he will show you how to instal it and also how it works and how to test it. So, I’ll pass you over to Russell now.
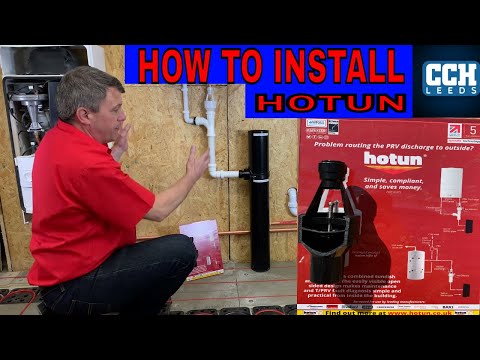
Hi. My name is Russell Armstrong, and I’m here today at this test setup facility to show you the installation sequence of fitting a Hotun highflow in this instance to a standard boiler with pressure relief and condensates.
The pressure relief valve, the cone off, take your Hotun highflow. In this instance, it’s the Speedfit version. Simply push that into place.
On the condensate, what we use is a 32 to 22 rubber reducer. Simply push that into your T fitting, that, push it up to there. And, connect your condensate. Then, attach your waist fitting to the sore pipe, obviously, your strap boss has already been cut and put on and sealed there. Then, all you do is simply, is just to, connect together, like that, and we’re done.
What is the reason, why would you need this, Russell?
Well, for instance if you’ve got three scenarios the best to explain, one would be a standard vented cylinder in an airing cupboard. Where you would take the venting cylinder out and you might want to replace it with a Combi. With a Combi going in, what would now be the middle of the house. Your biggest problem is getting the pressure relief valve. So, if you got your airing cupboard, you then might have a short length of corridor to get your pressure relief out, outside. And you might have to take your car pit, floor boards, notch your timbers, cut your hole through the wall, and then push your pressure relief valve to outside.
Whereas in most un-vented, sorry, in most airing cupboards, there’s a, generally a bathroom right behind it. And you would probably already rooted, you condensate to the bathroom. So, what you can now do is you can combine the pressure relief valve with the condensate and run the same pipe underneath the bath, to the bath waste. Or, if you’ve got a soil stack within the same facility, you can run directly to soil stack, cutting in the stub waste.
But why wouldn’t I just use the normal tundish?
Well, once you cut into your waste pipe, obviously the waste pipe or the soil pipe has got foul gases and odours and things. Which with the standard tundish, that would allow the gases to come out of the tundish. With the Hotun, we’ve got a patent valve, that’s got a rubber diaphragm in the bottom, a rubber seal. That, remains closed with the spring pressure when it’s not in abrasion. But still allows small amounts of water to pass through if the pressure relief valve discharges at a low volume.
If we’ve got higher volume, I’ve shown this on other videos, the water’s allowed to pass out quite freely. With this particular model it can go up to 25 litres a minute. Generally, on a boiler the pressure relief valve will only just, it will, what we call blip, it would just release a little bit of water, pressure dissipates and that’s it.
So, what you do is get a small amount, maybe, not even a half a cup of water passing through there. So that then allows that water to go through so, if I could show you a trigger point test. I can show you how that works.
So, part of the test I ask the installer to do, is a full flow discharge from the boiler pressure relief. That one’s relatively easy, you can just open up the pressure relief valve, to establish the flow to make sure it passes into drain correctly.
And the other one is what we call a trigger point test, or a trickle test. Now that’s to make sure that the valve opens when we’ve set it or it will open by design. That should be between 5 and 30 millilitres of water. So, 30 millilitres of water is about half way up the arms. So, if we fill our syringe, and of course on site you’d probably use a lipped jug or something, so if we fill up the syringe. What we do is we introduce a small amount of water into the side of the tundish and after certain minutes time that will pass through.
Likewise, on this one, the second product. So we introduce the water.
I know that most manufactures now, say that you can use it. So if you have a look on there, you got; Worcester, Ariston, Vaillant, Ideal, Navien, Glow Worm, Intergas. So, yeah, this might be good product for you.
Thank you for watching.


