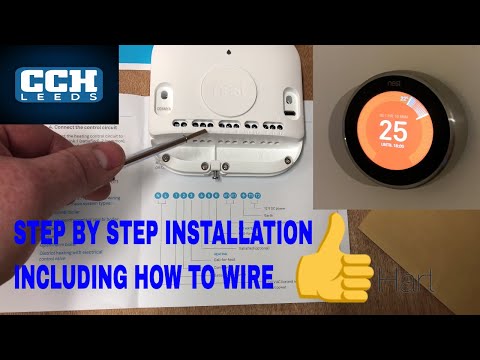
HOW TO WIRE , NEST LEARNING THERMOSTAT INSTALLATION Step by step guide How to install the nest thermostat via Opentherm and on / off connection , Boiler plus central heating control
Today we’re going to talk about Boiler Plus and the Nest Learning Thermostat. What we’re going to do is we’re going to connect this thermostat up onto this boiler here. I’m going to show you the different connections on the Nest thermostat. This Nest thermostat, you can connect it on OpenTherm, and you can connect it on the normal on/off settings. We’ll go through that. I’ll go through setting up the display, so you can set it onto OpenTherm. Let’s take a look.
As always, if you remove a case on a boiler, always make sure that you use a gas-safe registered engineer. We’ve isolated the power to the boiler, so we’ve got us Nest. Let’s open it up. We’ve got us thermostat. We’ve got the instructions. We’ve got us Heat Link. That’s what we’re going to use to start with, wire us wires into this now. Also comes with a back plate, hard wire and also your plug. That’s also got its screws in there as well.
If we look in the instructions on page 11, it tells us what all this is for. First of all, we’re going to go through wiring for just a normal on/off thermostat. This will work on most boilers on the market, so most combi boilers. Then after we’ve done that, we’ll go through the OpenTherm connections as well. You’ve got your neutral and you’ve got your live. Then you’ve got the ones that we will normally use for your link, which is number two and number three, which is there and there.
We’ve got us wires in there now for us link, which is number two and number three. Then when we look in the boiler … On this boiler here, we’ve just took the link out and we’ve wired into that link there. As I say with this, always make sure you use a gas-safe registered engineer because you’ve got to go into the combustion area of the boiler. Also the person needs to be competent with wiring as well.
This is now wired up in the most basic form for this particular stat. We’ll go through the different options further on in this video. I’ll just show you settings on this. When you set this up, you need to go into equipment, and we’ll go into pro set up. Continue. This is wired onto a combi boiler. At the moment, we’re on on/off there. If we wanted to change that, we could click into it and change it, but for this one now, put on/off and we gas and then we radiators. We’ll just click on continue. That’s it, and that’s done.
Now if we turn this up, the boiler will fire up. That’s now us net and that’s us nest on a stand, but you might want this nest to be fitted on the wall. What I’ll do now is I’ll show you how to wire it onto the wall as well and what we need to do for that. Then what I’ll do is after that, I’ll show you how to wire it via the OpenTherm as well.
With your Nest, you get a back plate. This is what you can fix onto the wall. On there, it’s got some numbers which is 2-1 and 2-2. They connect back to the Heat Link, so what you’ve got to be careful is you don’t put any voltage down this. If you wire this to 240 volts, 230 volts, whatever, you’ll blow up. You need to make sure. You need to check it with multimeter checking the wires coming out and make sure that it’s going to be safe.
Your T1 and your T2 are just here. These wires come from your stat and they’re coming to your Heat Link. We’ve got us wires coming out of the wall. We’ve tested these wires now and we’ve checked that these are the wires that are going back to the Heat Link and there’s no power coming down them. What I wanted to do now is wire this into this back plate. As we put this on the wall, this has got a little level on here so we can level it up, and it comes with some screws as well.
We’ve put the wires in now, and now we’re going to put the thermostat on the front of it. I don’t know if you can hear that clicking. Straight away, that’s working. Now we’ll connect it to OpenTherm and then we’ll go through the display, and I’ll show you how to set it up and set your boiler up, so your boiler will work on OpenTherm.
For OpenTherm, we need to move the number two and the number three and we need to put them into OT 1 and OT 2. We’ll do that now. We’ve now moved the wires on here, and we’re now going to do it at the boiler. This is the Baxi 600. For the Baxi 600, they go into these two connections here, these two black wires, so we’ll do that now. We’ve just put us wires into there now.
All you need to do then, once you’ve wired it, is go into your settings, go to equipment there, continue. Pro set up, continue. Combi boiler, click into there. Set it to OpenTherm. Gas because we’ve got gas. You can put electric in there. You can put oil. We’ve got gas. Radiators. Then we’ve set this to 50 degrees. That’ll make the boiler much more efficient. That’s it. That’s all set up. If your boiler is compatible with OpenTherm,


